• Home

  • Services

  • Portfolio

  • Equipment

  • Buy Studio Time

    • Book Online
  • Contact Us

  • Blog

  • More

    Use tab to navigate through the menu items.
    • All Posts
    • Music Creation, Recording and Mixin
    • mixing
    • pro tools
    • Music Mixing
    • Recording
    • EQ
    • compressor
    • music editing
    Search
    The Different EQ bands and What they mean
    Timothy Wheeler
    • Dec 4, 2020
    • 3 min

    The Different EQ bands and What they mean

    Throughout my blog series on EQs I am going to refer to the free EQ plugin that comes with Pro Tools, the Digirack EQ III 7-band. First, let’s talk about the input/output LED meters and gain controls (top left of the plugin). This simply shows the input and output signal level running through the EQ. Always check to make sure there is no clipping going on. If on the input or output side the signal is clipping, hitting red, simply turn the respective gain knob down until there
    50
    EQ Overview and Introduction
    Timothy Wheeler
    • Nov 29, 2020
    • 4 min

    EQ Overview and Introduction

    In the next series of blog posts, I’m going to go through EQ, or equalization. I will talk about why we use it, and when and how to use it. I think EQ is easier to understand than compression (my last series of blog posts), but when I see EQs added by young producers and engineers, I realize they are just as lost using EQ as a compressor. Partly, this is because they don’t understand frequencies. In this blog I am going to start with an overview. I think to understand EQ and
    30
    Compression Dos & Don’ts
    Timothy Wheeler
    • Nov 23, 2020
    • 1 min

    Compression Dos & Don’ts

    To wrap things up regarding compressors, I will offer 3 Dos and Don’ts as my final word for now. These are things to always keep in mind when working with compressors. Some may have been previously stated in an earlier blog post. DO          avoid using extreme settings to begin with, if you are just trying to control the dynamics. DON’T   add compression to every channel by default. Start off with minimal compression, and carefully choose where to add compressors. DO        
    40
    Compressors – What is the Knee and What does it do?
    Timothy Wheeler
    • Nov 12, 2020
    • 1 min

    Compressors – What is the Knee and What does it do?

    As you get better with compressors, you will start playing with other knobs and features. One of these is the knee. The knee refers to when and how the ratio starts to change when the compressor starts to take effect. A ‘hard knee’ means the compression becomes immediately active as soon as the input signal hits the threshold. A ‘soft knee’ means the compression becomes audible more gradually. A ‘soft knee’ also means that gentle compression starts happening further below the
    60
    6 Recording Myths – Busted!
    Timothy Wheeler
    • Oct 13, 2020
    • 4 min

    6 Recording Myths – Busted!

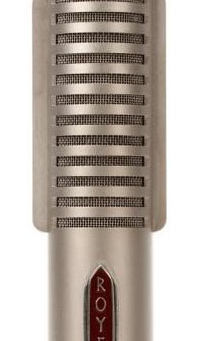
    It is hard to learn how to record and mix music today. With so much information available on the web, sometimes it is hard to know if the information is true or not – whether it can be trusted or not. Here are six myths that are not true! Ask anyone who really knows his stuff and is experienced and successful. Myth 1 – You can’t use ribbon mics on loud sources This myth is a good one to start with because like the best myths, there’s just enough of a grain of truth to it to k
    10
    Compressors 101 – the Basics (part 1)
    Timothy Wheeler
    • Oct 13, 2020
    • 2 min

    Compressors 101 – the Basics (part 1)

    Compressors seem to confuse a lot of people in the beginning, they certainly did me! Here is some helpful information concerning using a compressor in your mixing to help get you started. I will have other blogs on compression, so keep a look out! 1.  Decide what you want to achieve. There are really only 4 reasons for using a compressor – control a dynamic signal, add punch or impact, change the sound, create an unusual effect. Make a decision on what your goal is, which on
    10
    Timothy Wheeler
    • Oct 13, 2020
    • 3 min

    10 Tips for a great vocal recording

    Here are ten quick tips to think about the next time you record vocals: 1) Warm Up: Every vocalist needs to warm up. You wouldn’t run a marathon without stretching first, would you? Vocalists should warm up for at least 15 mins. before laying down a great performance. 2) Don’t record vocals in the morning: No vocalist is at their best if they’ve just rolled out of bed. If possible, try to schedule the vocalist in the mid-afternoon or evening. Use mornings for setting up
    10
    Timothy Wheeler
    • Oct 12, 2020
    • 3 min

    Organization Pt. 3 (patchbays)

    Patchbays Having a patchbay helps to optimize your signal routing and organization. Even the most modest of studio setups can benefit from the simple addition of a patchbay. Almost any configuration of cable connection – xlr, 1/4″ TRS jack, Cat5, etc. can be connected to a patchbay. And you can make your connections without ever having to leave your seat! If all your equipment I/O (input/output) is connected to the patchbay and it is labeled well, it will save you time by n
    00
    Timothy Wheeler
    • Oct 12, 2020
    • 2 min

    Organization (in your Production Studio) Pt. 2

    Group Cabling Keep cables grouped together by type (audio, MIDI, mains, etc.). This makes it easier to find faulty cables, patch equipment quicker and easier, and help reduce cable-borne noise problems. Putting a little distance between different types will reduce the potential for EMI (electromagnetic interference) problems, because mains cables can induce a 50Hz hum on audio cables. Always try to keep power cords of any kind separate from audio cables. If they do have to c
    10
    Timothy Wheeler
    • Oct 12, 2020
    • 1 min

    Timebase in Pro Tools

    In Pro Tools, material (audio or midi) on a track is associated with a type of Time Scale. All track types can be set to either sample-based (for the Sample Time Scale) or tick-based (for the Bars/Beats Time Scale). Different tracks can be set to different timebases as needed. Audio tracks are sample-based by default. This means that audio clips have absolute locations on the timeline and are tied to specific sample locations. If you change the tempo or meter the audio will
    180
    Timothy Wheeler
    • Oct 12, 2020
    • 2 min

    Recording from sound modules without effects

    If you’re involved with a lot of production work and do a lot of MIDI work like I do, you record a lot of projects using your sound modules. All sound (tone) modules automatically put effects on the sounds by default (so they sound better). Even free plug-in modules that come with recording software like Pro Tools do this. So if you use Xpand, Sampletank, etc. or you use outboard gear like Roland or Motif – you’ll want to know this! When I use my Motif-Rack, I always go to th
    10
    Timothy Wheeler
    • Oct 12, 2020
    • 2 min

    Unmount hard drives from within Pro Tools

    Have you ever tried to eject a hard drive from your system that you used in a Pro Tools session while Pro Tools was still up and running? It didn’t work, did it? Here’s the scenario and solution: You’re working in a Pro Tools session and the client gives you a hard drive (or flash drive) to grab wav files from. So you take care of that, go to the desktop, and try to eject the hard drive (command E) since you’re done with it. You get some dialog box that says the hard driv
    00
    Timothy Wheeler
    • Oct 12, 2020
    • 2 min

    Unmount hard drives from within Pro Tools

    Have you ever tried to eject a hard drive from your system that you used in a Pro Tools session while Pro Tools was still up and running? It didn’t work, did it? Here’s the scenario and solution: You’re working in a Pro Tools session and the client gives you a hard drive (or flash drive) to grab wav files from. So you take care of that, go to the desktop, and try to eject the hard drive (command E) since you’re done with it. You get some dialog box that says the hard driv
    390
    Timothy Wheeler
    • Jan 24, 2018
    • 2 min

    Demystifying Pro Tools Preference Settings part 3/3

    OK today let’s first go over the Editing tab. There’s really only one item I want to make sure you know about. At the bottom of the page is ‘Levels of Undo’. This preference sets the maximum number of actions that can be undone. The maximum is 32 levels of undo! That’s a lot! You can “back up” 32 times. Sometimes I use this to my advantage – I may try something knowing that I can go back and undo whatever it is I’m trying. For instance, in editing I might try to edit two diff
    10
    Timothy Wheeler
    • Jan 24, 2018
    • 2 min

    Demystifying Pro Tools Preference Settings part 2/3

    In the last blog post I covered the first tab under pro tools preferences – Display. Today I will cover Operation Preferences. First section is Transport: The very first selection ‘Timeline Insertion/Play Start Marker Follows Playback’ is important and I use it all the time. When selected, the Timeline Insertion and the Play Start Marker both move to the point in the timeline where playback stops. When deselected, the Timeline Insertion and Play Start Marker do not follow pla
    20
    Timothy Wheeler
    • Jan 24, 2018
    • 2 min

    Demystifying Pro Tools Preference Settings part 2/3

    In the last blog post I covered the first tab under pro tools preferences – Display. Today I will cover Operation Preferences. First section is Transport: The very first selection ‘Timeline Insertion/Play Start Marker Follows Playback’ is important and I use it all the time. When selected, the Timeline Insertion and the Play Start Marker both move to the point in the timeline where playback stops. When deselected, the Timeline Insertion and Play Start Marker do not follow pla
    00
    Timothy Wheeler
    • Jan 24, 2018
    • 2 min

    Demystifying Pro Tools Preferences part 1/3

    I remember how terrified I felt going to the Preferences (under Setup) tab! I looked at all that and said “Maaann! I am NOT touching anything here! I didn’t understand it and I CERTAINLY wasn’t going to change anything!! Wow! I think the first 3 or 4 years were like that – maybe even longer! It seemed too confusing to me and I just didn’t bother to change anything, much less even get in there! But now, I am in there all the time, changing settings the way I need to, when I ne
    20
    Timothy Wheeler
    • Jan 24, 2018
    • 2 min

    Demystifying Pro Tools Preferences part 1/3

    I remember how terrified I felt going to the Preferences (under Setup) tab! I looked at all that and said “Maaann! I am NOT touching anything here! I didn’t understand it and I CERTAINLY wasn’t going to change anything!! Wow! I think the first 3 or 4 years were like that – maybe even longer! It seemed too confusing to me and I just didn’t bother to change anything, much less even get in there! But now, I am in there all the time, changing settings the way I need to, when I ne
    10
    Stay organized by colorizing the tracks in Pro Tools
    Timothy Wheeler
    • Jan 24, 2018
    • 2 min

    Stay organized by colorizing the tracks in Pro Tools

    To help stay organized in Pro Tools, I colorize my tracks, MIDI channels, and sometimes regions. My master fader is always one color, the aux tracks are always a certain color, all the drum tracks are the same color, vocal tracks are all one color, etc. Separate colors can be assigned to audio and MIDI regions, tracks, markers, and groups. Default colors are automatically assigned to tracks, but I always override the default and set my own color scheme.[This is done on pro to
    00
    1
    2

    DoubleSharp Music Recording Studio

    4155 Lawrenceville Hwy NW
    Lilburn, GA 30047

    CONTACT US

    icons8-phone-64.png
    icons8-mail-64 (1).png

    770-906-3296

    tim@doublesharpmusic.com

    WE’RE SOCIAL

    • download
    • Twitter
    • Facebook
    • LinkedIn
    • Blog (Wordpress)

    Atlanta Recording Studios, Atlanta Music Studios, Gwinnett County, Gwinnett Recording Studio, Gwinnett Music Studio, Lawrenceville Recording Studio, Lawrenceville Music Studio, Karaoke, piano, grand piano, piano recording, music producer, music producing, record voice-over, record books on CD, record ebooks, record audio books, ADR, jazz piano, classical piano, R & B, film composing, Georgia recording studio, Atlanta, record rock band.

    © 2022 by DoubleSharp Music, Inc. All Rights Reserved | Full Site